
How to Carve Iberico Ham: Complete Step-by-Step Guide
Iberico ham (jamon iberico) is one of the most internationally recognised delicacies in Spanish gastronomy, and its flavour is loved everywhere in the world, no matter where you are from. But do you want to learn how to carve jamon iberico properly? To enjoy all its nuances, each slice must have the right thickness — not too thin and not too thick. At Enrique Tomás we are here to help you achieve the perfect cut. Let’s take a closer look at this complete ham carving guide.
Iberico ham carving video
To make things easier, we have prepared a step-by-step video on how to carve ham. It doesn’t matter whether you are cutting jamon iberico, jamón serrano, jamon de cebo de campo, or 100% acorn-fed jamon iberico (bellota) — the carving technique is the same for all types of Spanish ham.
In the video, our master carver shows you the full process in a simple and visual way, so you don’t have to worry about anything. All you need is to buy a good ham, get the right tools, and follow these steps to achieve the perfect slice.
Tools needed to carve ham at home
Before you start carving iberico ham, make sure you have the right tools to portion your piece professionally:
- Ham stand (jamonero)
- Ham carving knife
- Boning knife or small utility knife
- Sharpener or honing steel
- Tongs or fork
Got everything ready? Let’s begin.
How to start carving a jamon iberico
Carving a ham is not an exact science. You can start from two areas: the maza or the babilla. The position of the hoof (facing up or down) determines where you begin, and neither option is better than the other.
In bars and restaurants, where jamon iberico is consumed quickly, the ham is usually placed with the hoof facing upwards, so the juiciest part (the maza) is served first. At home, the question is always the same: how should you place the ham on the stand?
Our recommendation: if you are a small household (two or three people), it is usually better to start like in restaurants, enjoying the most tender meat first when it is at its optimum stage. Any remaining jamon iberico can be brought to an Enrique Tomás store so it can be sliced and vacuum-packed to preserve its quality. If there are more people at home (four or more), it can be better to start from the babilla to balance the curing process and avoid it drying out, saving the maza for later.
Step-by-step guide to carving Iberico ham
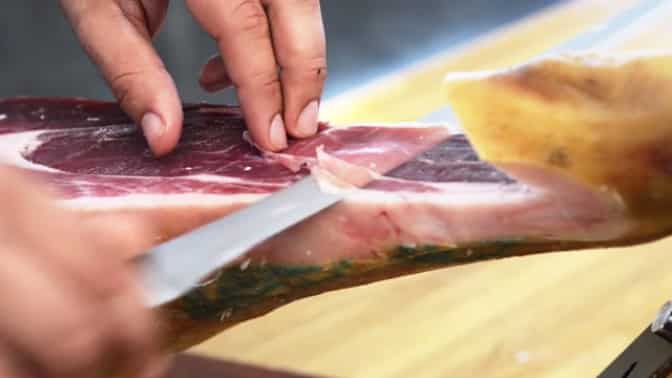
It’s time to start carving jamon iberico properly. Begin by sharpening your ham knife. It is also recommended to have a wider blade knife for removing the rind, which should also be well-sharpened. Use it to remove the outer skin and fat — and yes, discard it. Contrary to popular belief, it should NOT be used to cover the ham again; once removed, it no longer fulfils its protective purpose. Once the meat is exposed, switch to your ham carving knife.
Slice slowly in horizontal movements, starting near the hoof and moving towards the tip. Always place your guiding hand behind the knife for safety. Let's see the full step-by-step process!
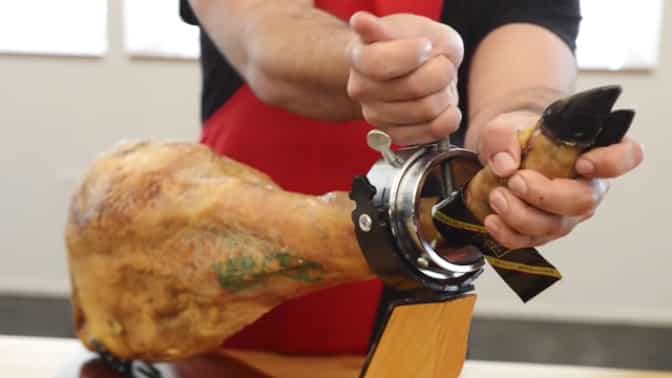
Step 1: Secure
Ensure the ham is firmly secured on the ham stand (jamonero) and does not move during carving.
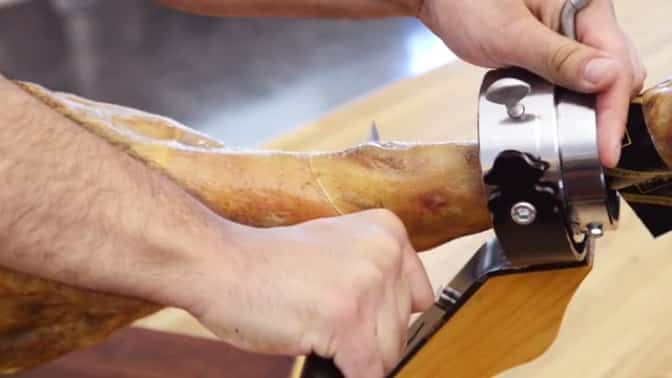
Step 2: First Cut
Make the first deep cut at the top near the shank area, perpendicular to the leg and just under the joint. Cut a wedge below it.
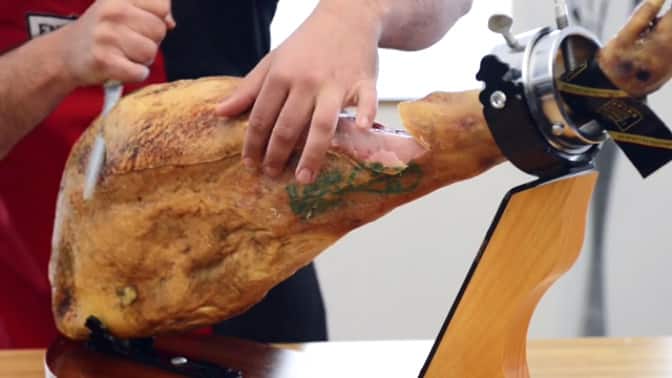
Step 3: Peeling
Remove the rind and outer yellow fat progressively, only from the section you will carve, so the remaining meat stays juicy.
Step 4: Slices
Start slicing thin pieces following the natural direction of the ham (from hoof to tip).
Step 5: Hip Bone
Carefully work around the hip bone using a short boning knife to clear the path and maximise the yield.

Step 6: Turn Around
Once the maza area is finished, turn the ham over and start carving the babilla side.
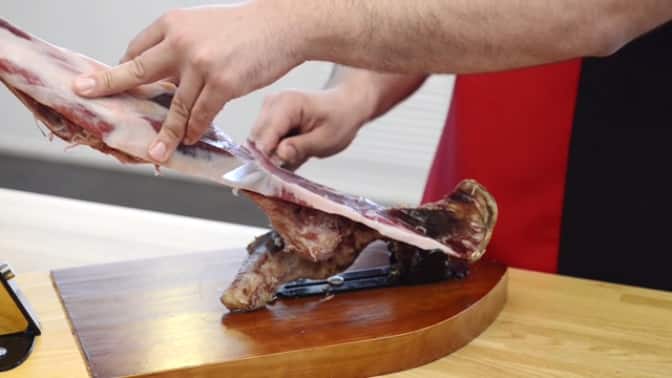
Step 7: Babilla
Here you will encounter the babilla bone and the kneecap. Continue carefully slicing around these bones and joints.
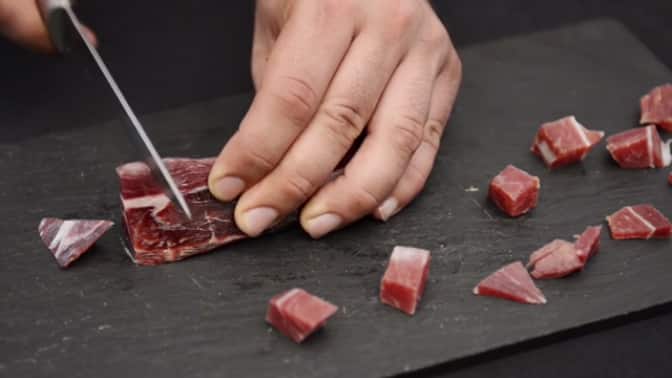
Step 8: Cubes
Use any remaining meat to cut intoiberico cubes (taquitos) for tasty recipes, and keep the bones for stocks.
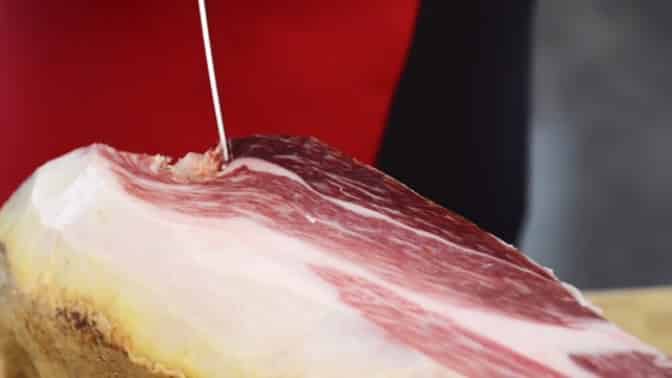
How to get the perfect slices
Now that you know how to start and carve jamon iberico, the final goal is achieving perfect slices. The key is to let the knife slightly show through each slice. This ensures the slice is thin enough to melt in your mouth, but thick enough to release all the flavour and fat marbling of the iberico ham. That sensation when the fat melts with the heat of your palate is what makes jamones ibericos truly unique worldwide!
Now you know how to carve a whole ham properly. All that’s left is to choose a good jamon iberico, buy it, and enjoy it. And if you struggle to get perfectly thin slices as you like them, don’t worry — bring your ham to any Enrique Tomás store and we will slice it for you!


